
Task details, dates, checklists & labels
Add task details, organize the work and set a reminder.
Click Add description and enter the task details. Depending on your authorisations, you can change the start date, deadline and priority of the task. You can also enable the “read only” option. The task with the changed priority will be marked with a colour line, marked below with the red arrow.
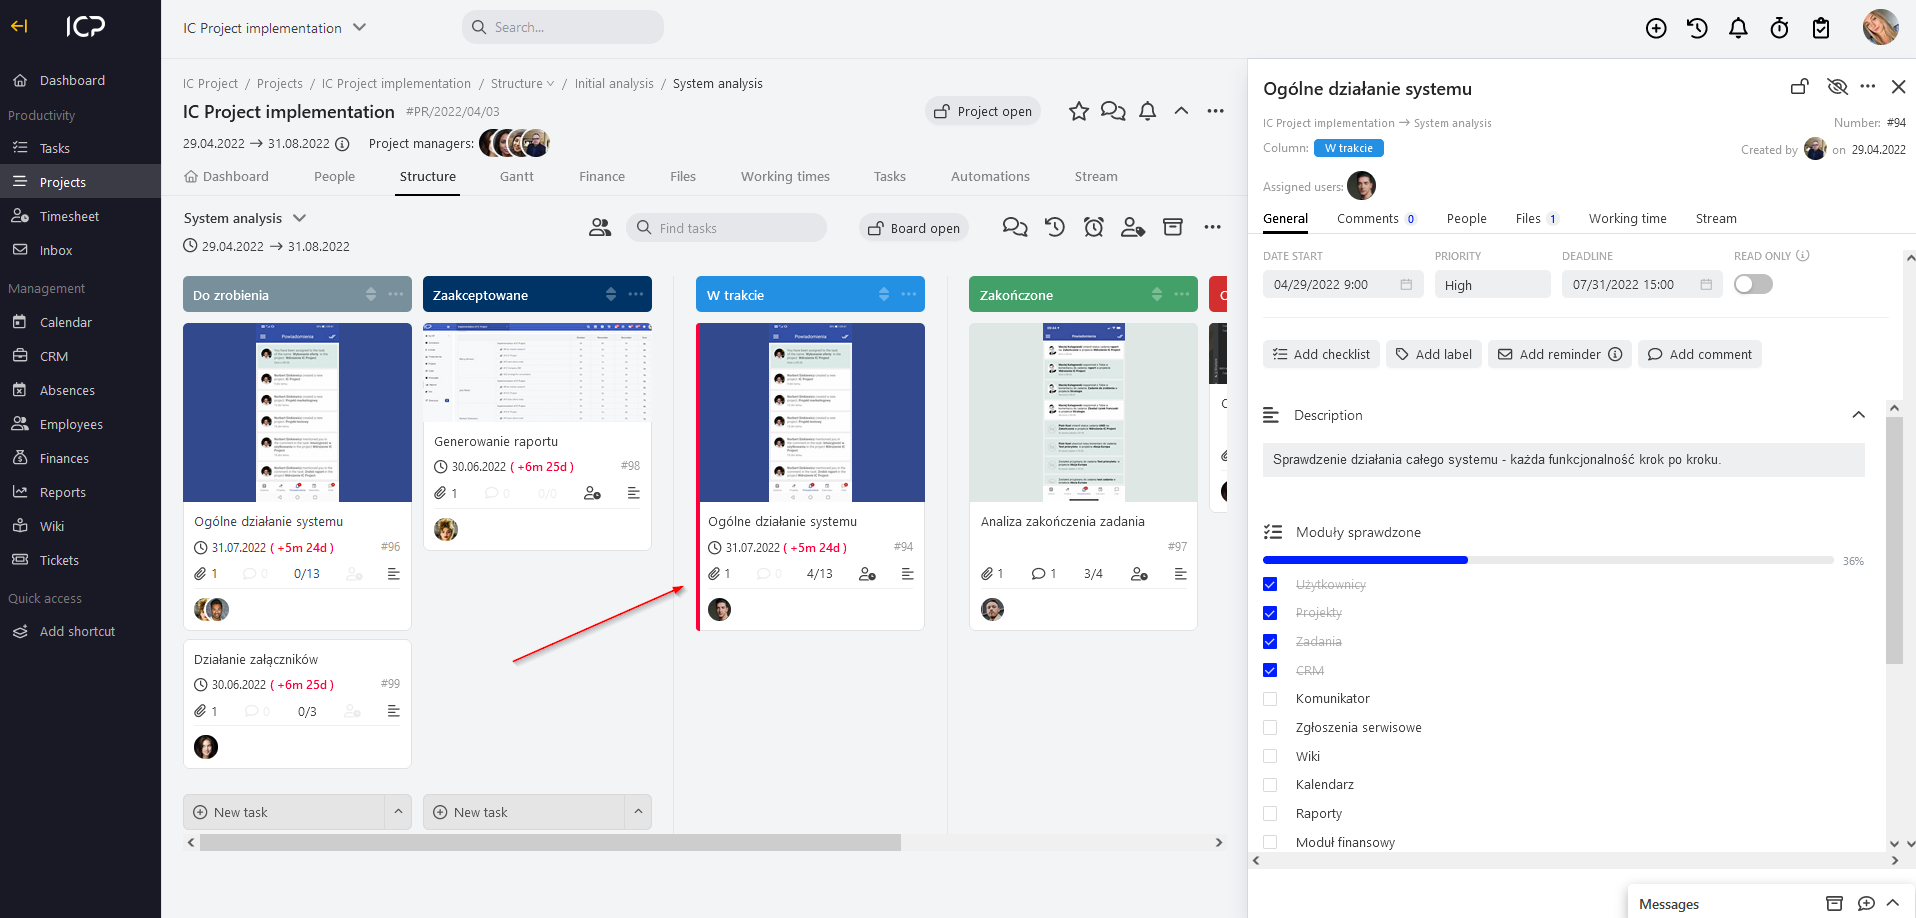
Adding a checklist
In every task, you can add a checklist. Click the  button. Below the task description, a window will appear where you can enter its name. Then, press Enter. Continue entering the items of the checklist – always accept them with the Enter key.
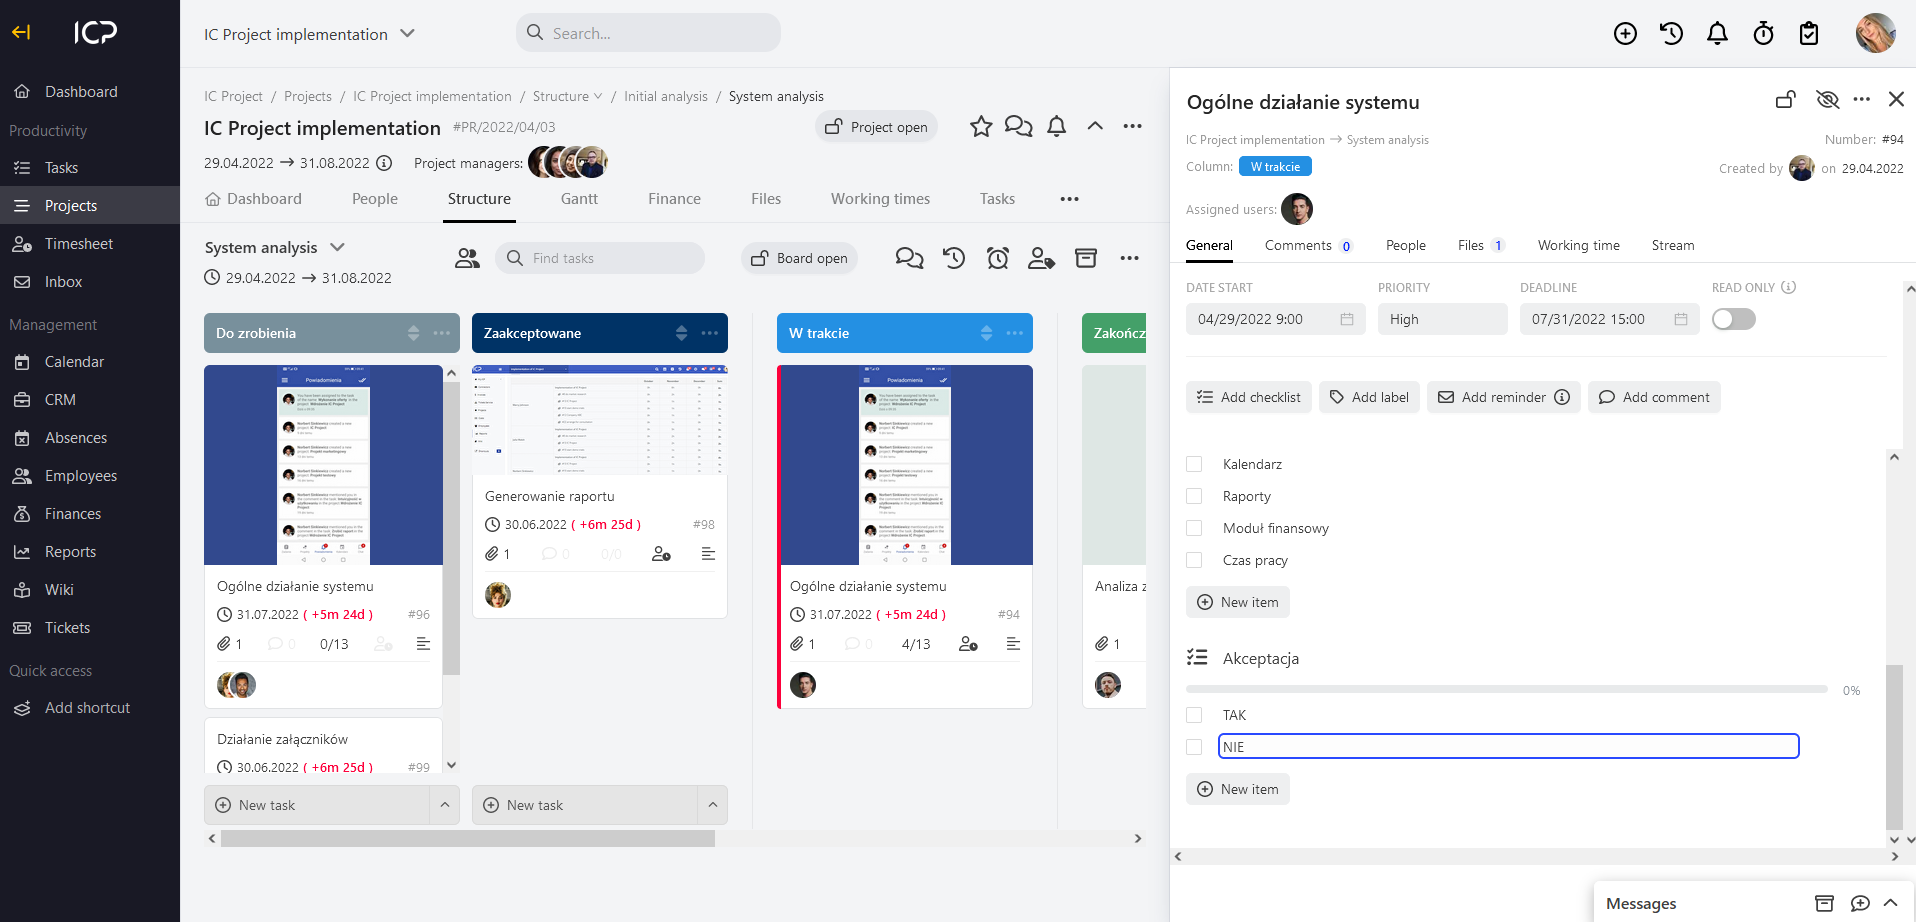
If you want to remove the given item from the checklist, move the cursor over it and click  on the right. With the Drag & Drop method, you can change the positioning of individual items in the checklist. On the other hand, if you want to add a new item in the list, click
 .
Adding a label
Another way to mark the tasks is adding labels. You can use many labels for every task. Click  , select
 and enter the name of the label, mark it with the selected colour decorator and save it. Your label has been added to the task.
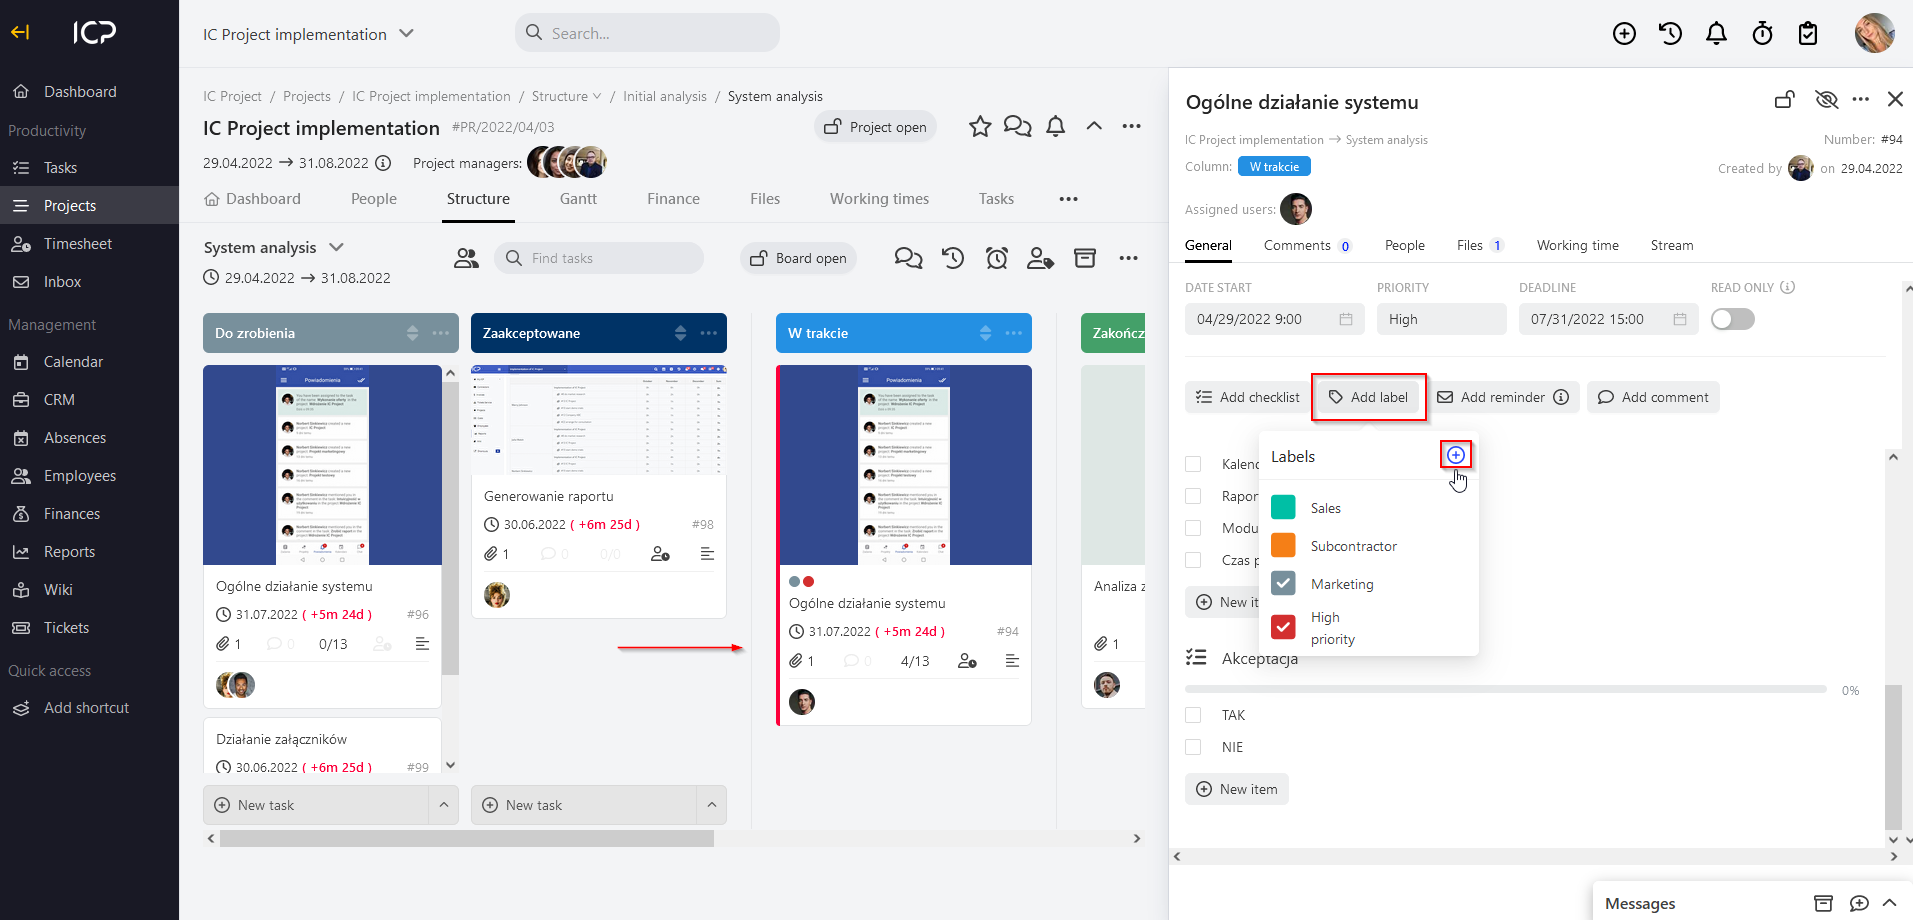
and select the label. On the other hand, in the IC Project system settings you can manage the labels – remove them or change their names. You need the relevant authorisations, though.
Adding reminders
Adding a reminder for the task means that only you (the user currently logged in the system) will receive an individual e-mail reminder according to the set date. Click  , select the date (day and time) > click OK > Save. And done!
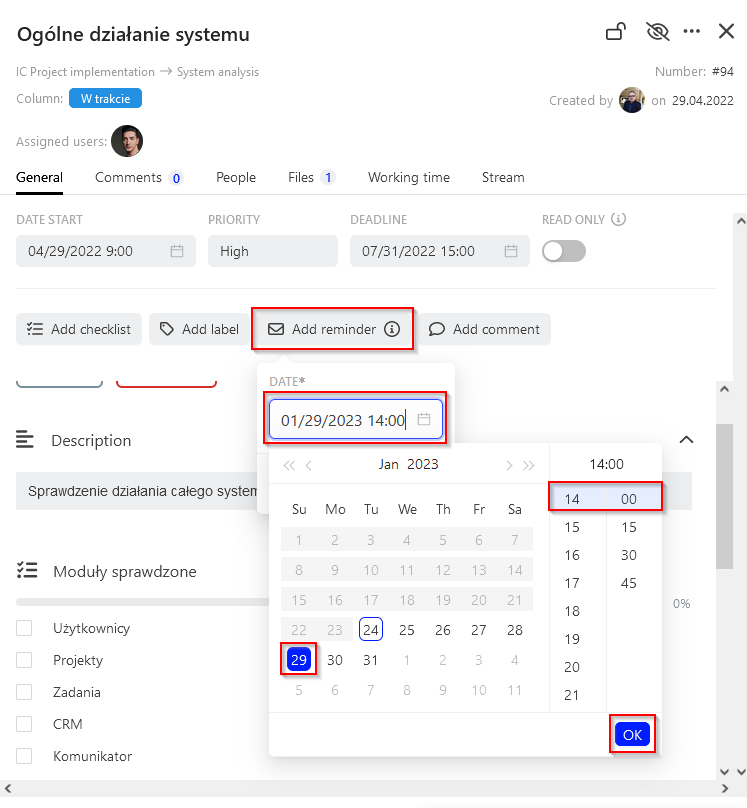
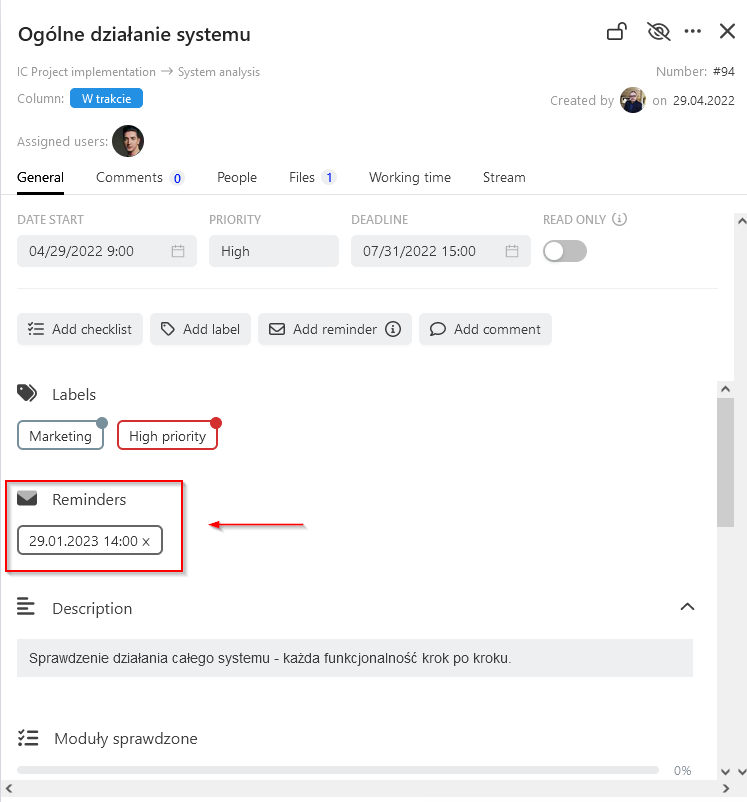
If you want to remove the set reminder, click x marked in the image below.
Comments
Task comments & mentions